Using the Converter
During installation, a RiverDocs Converter shortcut icon is placed on your desktop and a RiverDocs Converter option is added to your Windows Start menu.

|
To begin using the Converter, double-click the RiverDocs Converter icon on your desktop. |
Alternatively, if the icon is not visible, (hidden by an open application window, for example),
- click Start - All Programs
- navigate to the RiverDocs Converter menu option using your mouse or the arrow keys, and click it – or press the Enter key
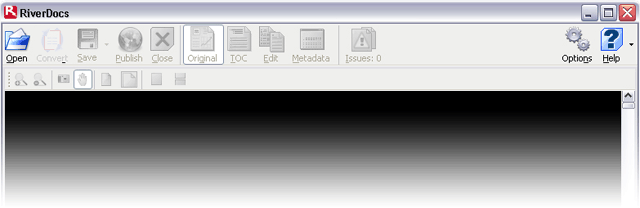
The RiverDocs Converter main screen is displayed. At this stage, with no file open it is empty and only the Open (Alt+O), Options (Alt+P) and Help (Alt+H) buttons on the Main toolbar at the top of the screen are activated.
Configuration options
You can now open and convert a file immediately, but it is recommended that you first click the Options button to view, and if necessary change, settings that determine the format of your converted document.
Conversion settings
Source Document
Image handling
The Image handling options in this section allow you to include all the original document's images in your converted document (Process all) or to ignore them. There are two "ignore" settings, Ignore (DTP) for desktop publishing files such as Word or PDF, and Ignore (scanned) for documents produced with scanners.
Headers and footers
There are three options for processing headers and footers:
- None: This the default, and removes the headers and footers.
- Page mode: This retains the headers and footers and places them on each converted page.
- Document mode: This places a header on the first page and a footer on the last page.
Output settings
.riverdocs file with a unique name before publishing, as you can then re-open the .riverdocs version and re-publish with the former settings if you change your mind.
There are three main settings to consider:
HTML Creation
Publish mode
The Converter can output the converted document as
- Single file – a single HTML page
- Page-based – multiple pages, one for each page of the original document
- Section-based – multiple pages, one for each of the documents section headings
Section-splitting threshold
If you choose section-based, you have the further option of splitting the converted document into HTML files at H1, H2 or H3 heading levels. For example, the H3 setting will generate a collection of files beginning with headings at levels 1-3.
HTML Tidy configuration
The Converter offers these settings for its built-in accessibility checking process:
- Section 508: Conformance to US Section 508 requirements together with WCAG 1.0 level 2 ('AA') accessibility.
- (X)HTML 1.0 A (accessibility level 1, or A): In addition to doctype, all WCAG priority 1 checkpoints will be tested.
- (X)HTML 1.0 AA (accessibility level 2, or AA): In addition to doctype, all WCAG priority 1 and 2 checkpoints will be tested.
- (X)HTML 1.0 (Strict) AA (accessibility level 2, or AA): In addition to doctype, all WCAG priority 1 and 2 checkpoints will be tested.
Other output settings
CSS Options
The Converter creates a CSS stylesheet for your document automatically during conversion. You can edit the styles in this before publication. However, you can also import an existing stylesheet, which will be incorporated in the published output.
Tutorial Options
This setting enables you to switch off the RiverDocs startup tutorials. You can still view them by opening the Help pop-up menu.
HTML Navigation
If you select Page-based or Section-based publish mode, which create separate HTML pages for every page or section in your original document, to facilitate use of the HTML version you can click the Enabled checkbox, which directs the Converter to insert a set of page navigation controls at the foot of each published page.
In this section you can also edit the link text that displays – for example, you could change the default text "first" to "first page".
Commands
Open
Click the Open button (Ctrl+O) in the Main toolbar, or select File - Open (Alt+F+O). In the Open File dialogue box, browse to the file you wish to convert, select it and click Open (or press Enter) to preview the document.
Convert
To convert the document, i.e. generate an (X)HTML copy of the document with Table of Contents, click Convert (Ctrl+R) or select File - Convert (Alt+F+C).
Issues
When you have converted a document, this button becomes active and accessibility issues requiring human input are flagged with a live counter display in the Issues button on the main toolbar. Click Issues (Alt+F10) to open the Accessibility Issues pane, where issues are listed in detail. Selecting an item in the list displays and highlights the item that needs attention in the Editing pane.
During editing, to view an updated total number of accessibility warnings, click the button or press Alt+F10. This also updates the numeric readouts in the Accessibility Issues pane.
You can view and edit the (X)HTML copy, and correct any accessibility issues in the Editing pane. If the pane is not open, click Edit (Ctrl+Shift+E).
Save
To save your current work, click Save (Ctrl+S). This saves any changes that you have made so far in a RiverDocs project file (.riverdocs), together with all resources extracted from the source document. Using this option gives you access to the highest-quality images saved in the source document. You will also have access to images transformed to match the source document display, or during editing.
You can reopen your saved file later.
Publish
To Publish your current work, click the Publish button (Ctrl+P), or select File - Publish (Alt+F+P). This opens the Publish dialogue box, where you can choose a save output format. You can export an (X)HTML project folder with all pages including a contents page, images and a CSS style sheet.
Alternatively, you can publish the whole document as a single CHM file, which can be viewed on almost all personal computers without the need to download or install a reader.
Closing a document
To close an open document, Click Close (Alt+C) or select File - Close (Alt+F+C). This closes the current original document.
It also closes the current converted (X)HTML copy.
Closing the application
To close RiverDocs Converter, click the Windows Close button in the top right-hand corner of the RiverDocs window, or select File - Exit (Alt+F4).
.riverdocs file when you begin editing, and to save regularly during your editing session. An on-screen dialogue box will give you an opportunity to save or discard any changes in the converted document before closing the Converter or opening another document.
