Screen Capture
Using the screen capture feature
Sometimes, when a logo or other image in the original document combines a text label with graphics, the
Converter may separate the text label from the graphics part during conversion as shown here.

graphics text
If the graphic element is in EMF or EPS file format, it may be discarded altogether.
To fix this, you can take a snapshot of the original item and insert it as follows:
- Start with the Original and Editing panes open. If necessary, click the Original or Edit buttons to open them.
- In the Editing pane, delete the disrupted image, leaving the cursor at the image position.
- Click the Screen Capture button.

- In the Original pane, click the page containing the item you want to capture. A translucent rectangle displays.
- Drag the translucent rectangle over the item you want to capture, and resize it to frame the image.

- Click the Screen Capture button again. The copied item is inserted in the Editing pane.

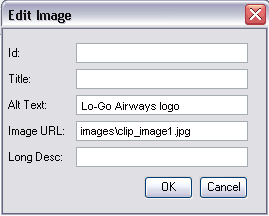
You should now add an alt text to the new replacement image's properties, for accessibility. - To give the new image an alt text, click the Insert/Edit Image button in
the Editing toolbar.

The Edit Image dialogue box is displayed, where you can enter an alt text for the image. The Converter automatically inserts the URL of the copied image in the Image URL text box with a name such as "images\clip_image1.jpg". Type a suitable alt text description of the image into the Alt Text box. - Click OK to close the dialogue box. You have replaced the image.
You can also change the replacement image's properties later in your editing session by selecting it and clicking the Insert/Edit Image button to reopen the Edit Image dialogue box.
Shredded images
Some document creation applications, or authors, use multiple image elements to save a single image. These can appear "shredded" when viewed in the Edit pane. They can be fixed using screen capture, by replacing them as described above.
Resizing images or text
Sometimes a rendered item such as a detailed graph may have captions or details that are hard to read or see. You can zoom in on these items in the Original pane, capture the larger version and insert it in your converted document.
Alternatively, if you want to reduce the size of an item, you can zoom out and capture a smaller view of it.
