How to convert a document
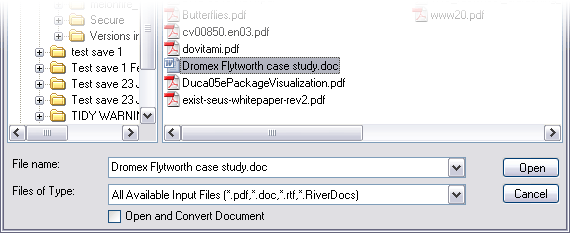
To locate and select a file for conversion, you
- Click the Open button (Alt+O) in the Main toolbar.
The Open dialogue box opens. - Browse to the file you want to convert, and select it.
- Click the Open button (or press Enter to open and view the file without converting it).
The main screen opens, displaying your document in the Original view pane.
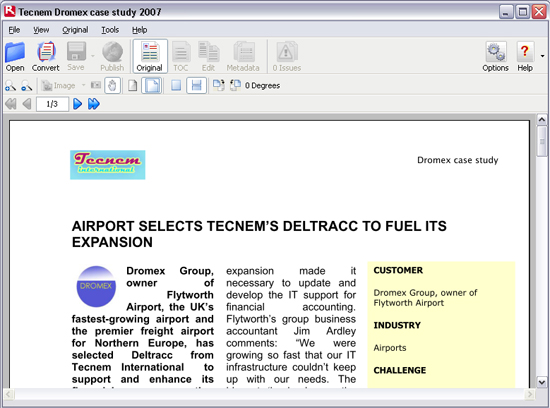
Main screen, with a document that has just been opened displayed in the Original pane.
When an original document has been opened, the Convert button on the Main toolbar becomes active. To start conversion, click the Convert button or press (Alt+R).
RiverDocs progress messages may display during conversion of the file. (With a small document file or a very fast computer you may only glimpse them, or they may not be visible).
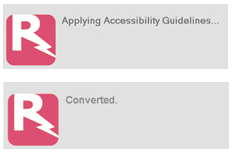
When the "Converted" message displays, automatic conversion is complete.
The image below shows the main screen after a document has been converted and all five panes opened. Note that the Properties pane and Accessibility Issues pane open and close together but can be resized for convenient viewing. The width of all panes can be adjusted by dragging their frames. (13).
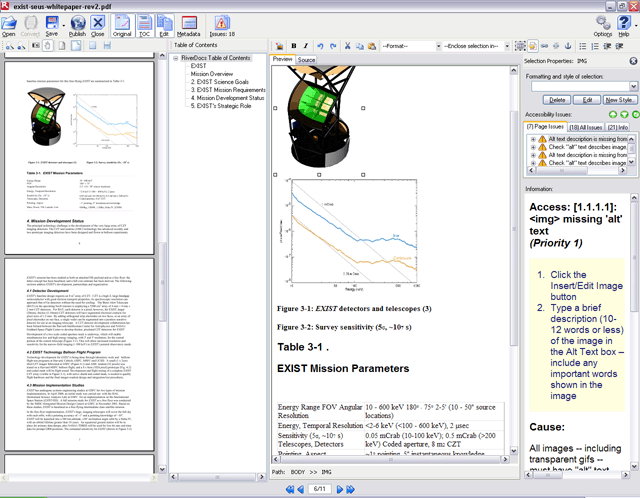
Main screen with the Original, TOC, Editing, Properties (CSS Editor) and Accessibility Issues panes open. (For clarity, the RiverDocs window is shown minimised).
Key to graphic user interface components
- Original pane: View unconverted document
- TOC pane: View and edit HTML table of contents generated during conversion
- Editing pane: View and edit converted HTML output
- Accessibility Issues pane: View tabbed pages listing and counting accessibility issues in output. Click to select an issue and the corresponding HTML element.
- Information pane: Read Tidy HTML error messages and advice from Tidy and RiverDocs about the currently selected accessibility issue
- Main toolbar: Open, save, activate views, set options and access help
- Editing toolbar: Edit text and HTML format of items in Editing pane, and insert or edit tables, images, lists, anchors and links. Includes the Properties button that opens and closes the CSS Editor and the Accessibility Issues list
- Original view toolbar: Select and adjust page view and use screen capture
- Selection Properties: Displays currently selected HTML element (See 12 below, Path)
- CSS Editor: Use the New Style, Edit and Delete buttons and the Formatting and style of selection drop-down list to modify the CSS style of a selected element, or add a new style. Using Path (see 12), selectors such as
h3can be edited directly, so that a change in one affects all similar elements in the document. - Navigation controls: Click the blue forward and back arrows, or type in the page number you want to go to and press Enter. Click sync to switch original and edited pages simultaneously.
- Path interactive display: The Path display shows the currently selected HTML element, together with the other structural elements in which it is embedded. Each element in the Path display is also a button that you can click to perform CSS edits selectively on that element.
- By selecting the frame boundaries, you can adjust the height and width of the panes.
