Toolbar controls key
Key to Main toolbar controls

Main toolbar button controls
![]()
Opens the Open File dialogue box, where you can locate and select a file on your system for conversion, or open a RiverDocs project file you want to work on. Clicking this button is the first step in the conversion process.

Converts an open file. This button becomes active after you have opened a file in the Open File dialogue box.

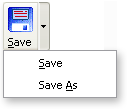
Saves converted output, with any editing changes, to a RiverDocs project file (.riverdocs). This enables you to save work in progress. When you
first save your work as a project, click the down arrow beside the button to open the popup menu and select
Save as, so that you can name
your project. To save further changes, you can simply click the
Save button.
To save for web publication, you use the Publish button.

Saves output to hard disk. Click this button when you have finished editing your converted document and want to save it for web publication. To save work in progress that is not yet ready for publication, click Save to save
to a project file.

Closes the currently open file without saving to a project or output file. This button becomes active when you have opened a file in the Open File dialogue box.

Opens and closes the Original pane, where you can view the currently open document before and after conversion, allowing you to compare the converted output in the Editing pane with the original, and use the screen capture feature where necessary to copy and replace selected items. This button and the associated Original toolbar controls become active after you have opened a file in the Open File dialogue box.

Opens the Table of Contents (TOC) pane. During single-page or page-based conversion, RiverDocs Converter automatically generates a table of contents (TOC) for the converted document based on its headings, which you can view and edit in the Table of Contents pane.
Note: If you opt to convert in section-based publishing mode (see Options), the TOC is created according to your Section splitting threshold setting, rather than dynamically from the documentís existing heading hierarchy. You can view this section-based TOC, but not edit it.

Opens and closes the Editing pane, where you can view the converted document and make any necessary changes to your converted documentís HTML, including its underlying code, before saving.

Opens the Document Properties dialogue box containing the Metadata Editor, where you can edit and add Dublin Core and other HTML metadata categories and values, which will save as part of your converted document. Added metadata categories will also become part of your RiverDocs stored user settings and appear in subsequent sessions unless you remove them before closing the Converter.

Opens and closes the Properties and Accessibility Issues panes and displays the current total number of issues outstanding for the current converted document. As you fix issues, the number updates automatically as you click forward from page to page. You can also check the number by clicking the Update button and noting any change in the Issues button read-out. Note: If you inadvertently add new issues during editing, e.g. by inserting an image without alt text, the new reading may be higher than expected.

Opens the Options window for making conversion output settings. You should click this button before starting conversion. The Publish mode and Section-splitting threshold settings allow you to choose the page format and heading structure of the converted document.

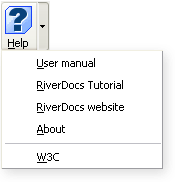
Opens RiverDocs help files. The down arrow on the right of the button opens a menu of other help options (shown open).
