Publishing a converted document
Publishing the converted document

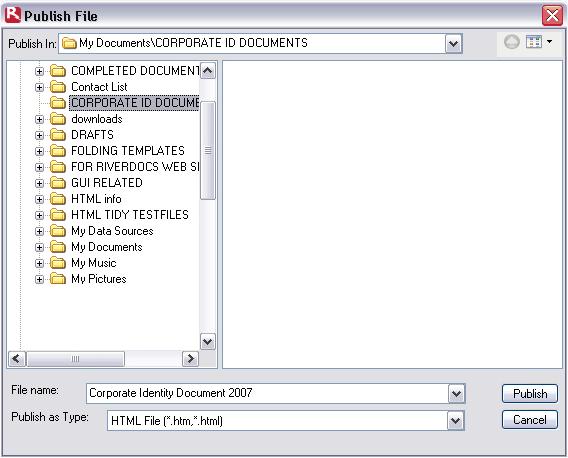
When you have finished editing the output and wish to save the converted document, you click the Publish button. This opens the Publish File dialogue box, which has the following components for saving your file:

The Publish in box at the top of the screen displays the currently selected destination for the saved output.
The Publish File dialogue box has two panes, the Folder structure pane on the left for browsing to your save destination folder, and the Publish (save) folder pane on the right where the contents of the save destination folder are displayed. In the example, a file called “Corporate Identity Document 2007” is about to be saved in My Documents\CORPORATE ID DOCUMENTS, which is currently empty.
At the foot of the dialogue box are two drop-down list boxes:
- File name, for naming your published file
- Publish as Type, where you can select one or more file formats for the saved file.
You click the Publish as Type drop-down list box to select one or more file formats for the saved file.
You can opt to save the file as:
- HTML
- CHM
When you have selected the output format, you click Publish.
<img id="tidy126" src="images/5.jpg name="tidy126" /> to the HTML source.
You should not delete or edit these tags, as they are used by RiverDocs software. Tidy references are stripped from the HTML when you publish.

Foot of Source tabbed page, showing markup removal notice
